Join World's Fastest Growing B2B Network
Join World's Fastest Growing B2B Network


| MOQ | 2 pieces |
| Port | shenzhen |
| Packaging | paper box |
| Lead Time | 1-5days |
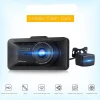
| Chipset | hisilicon3556 | Screen Size | 12inch |
| Resolution | 2K +1080P | Number of lens | 2 |
| Video Format | MP4,H.265 |
1. Use the automatic recording function
Start the car engine, the recorder will start and start the recording function automatically, turn off the car engine, the recorder will automatically save the recording content and shut down.The recorded images are saved in sections on the TF card. When the TF card is full of storage, the recorder will cover the earlier recorded images.The recorded time period can be set in the menu, and the range is 1 minute /3 minutes /5 minutes/three files.
[note] when selecting any of the three files of "1/3/5" minutes, the recorder will cover the earlier recorded images when the TF card is full;
The forward normal folder is "front_norm" and the back normal folder is "back_norm"
"Front_emr", "back_emr", "back_emr", "front_emr", "back_emr", "back_emr", "back_emr", "back_emr"
The forward photo folder is "back_photo" and the backward photo folder is "front_photo"
2. Use the manual recording function
Press the "power button" of the recorder. After the recorder is started, press the "confirm" button to start recording.If it is necessary to shut down, press [power button] for 2 seconds, the recorder can automatically save records and shut down.
3. Collision sensing function
The device is equipped with a g-sensor. In case of a serious vehicle collision, the recorder will lock the broken video recording of the accident and save it as a special image. At the same time, the lock icon is displayed in the upper left corner of the display screen.Locked images are not cyclically overwritten.
"Tip"
B. The g-sensor supports sensitivity adjustment. You can change the Settings according to the actual needs in the Settings menu.
4. Date and time setting
In the recording or standby state, the 1./3 part in the middle of the screen slides into the setting interface or clicks the setting button to select the date setting.Slide up and down to adjust the date and time.
[note] in order to effectively record the date and time of obtaining evidence of driving safety accidents, please set the correct time before using the machine.
5. One-click mute function
In the working state, click the recording button on the screen, and the microphone on the screen turns into the disable icon, indicating that the recording function has been turned off. At this time, the recorder only records images but not sounds.When the recording key is clicked again, the microphone on the screen turns into the recording icon, indicating that the recording function is resumed.
[prompt] the Settings will be automatically saved, and there is no need to set the mute function after starting up again.
6. Shoot files for playback
Video recording and photo taking interface: slide the screen from left to right to enter the playback interface.
7. Reverse visual
First, you must connect the car charger to the recorder, and the red line on the cable camera to the headlights.The car charging machine will automatically start the recording state, and the reverse image will be displayed if there is a reverse in any state.The machine will automatically return to video mode after the end of reverse viewing.
8. Parking monitoring
When the parking monitoring function is turned on, if the car has a slight vibration (trigger sensitivity can be set as needed in the menu), the recorder will automatically start recording for 20 seconds and then shut down.
9. The USB model
In the recording or standby state, part 1./3 in the middle of the screen slides down to enter the setting interface or click the setting button to connect the USB cable, select USB in the setting and pop up window: USB storage, USB camera and USB recording.
Mirror mirror
In the recording or standby state, the middle 1/3 part of the screen slides down to enter the setting interface or click the setting button, select rear mirror, and then pull left and right mirror after opening.But playback doesn't change.
11. Streaming media
In the recording or standby state, part 1. 3 in the middle of the screen slides down to enter the setting interface or click the setting button, and select "on" and "off" of the streaming media function.When streaming media is "on", full-screen rear circuit is the default when starting; when streaming media is "off", full-screen front circuit is the default when starting.
|
Sensor |
Front Sony 355+Back 2308Y |
|
Screen Size |
11.66:1280*720 1920*1080P |
|
Degree |
170 |
|
Resolution |
11.66:2560*1440,1920*1296 |
|
Resolution |
9.35/9.66: 2560*1440,1920*1080 |
|
Storage compression mode |
H.265 |
|
Video Format |
MP4 |
|
TP |
support, |
|
storage temperature |
-30℃~80℃ |
|
operating temperature |
-20℃~70℃ |
|
operation humidity |
15-65%RH |
|
TF card |
UP to 64G (do not include) |
|
Standard Voltage |
DC5V |
12. Time-lapse monitoring
In the recording or standby state, part 1. 3 in the middle of the
screen slides into the setting interface or clicks the setting
button to select the time-lapse monitoring
function.The
options are: "off", "1S", "2S", "3S".When
selecting "off", when equipped with voltage drop line: disconnect
ACC line and the machine will automatically shut
down.Power
off when car charger is supplied.select
"1S", "2S" and "3S" with voltage drop line: when the ACC machine
is disconnected and the screen is off, it automatically enters
into the time-shrinking recording state, recording at "1S one
frame", "2S one frame" and "3S one frame"
respectively.ACC
on the power, machine on screen back out of shrink, start normal
recording.When
the car is charged, the machine shuts down
automatically.
8rd Floor, Building A, Jiabao Technology Park, Dawo Village, Kengzi Town, Pingshan District,Shenzhen,China
One moment please
 Member's Area
 Messages
  Need Help